Hydroponics for Beginners: Setting Up Your First System
Hydroponics is an exciting way for beginners to start growing plants without soil, making it perfect for people with limited space or those interested in sustainable gardening. As a beginner in hydroponics, you’ll be amazed at how simple and rewarding it can be to start a hydroponic garden. This guide will walk you through setting up your first hydroponic system, covering everything from choosing the right setup to understanding the essentials of plant nutrients.
1. Understanding Hydroponics Basics
One of the first steps in hydroponics for beginners is understanding different system types. At its core, hydroponics is about replacing soil with a nutrient solution that provides essential minerals directly to the plant roots. The six most popular hydroponic systems for beginners are:
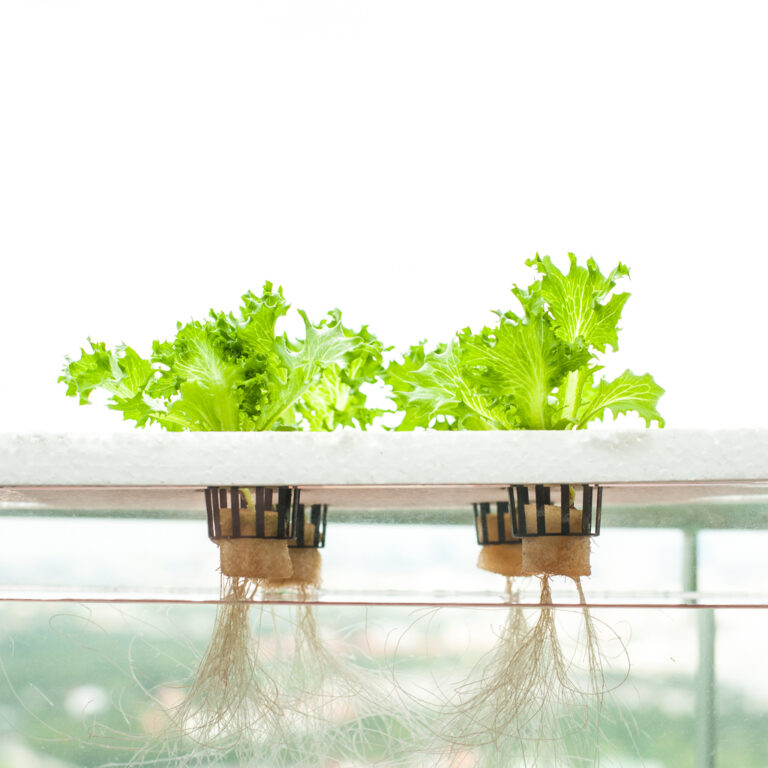
- Deep Water Culture (DWC): Plants are suspended in nutrient-rich water with an air pump to oxygenate the roots. It’s ideal for leafy greens.
- Nutrient Film Technique (NFT): A shallow stream of nutrient solution flows over the roots, which are suspended in channels. Great for herbs and smaller plants.
- Drip System: Nutrient solution is dripped onto the plants’ root zones. Works well for larger plants like tomatoes and peppers.
- Wick System: A simple passive system where a wick delivers nutrients from a reservoir to the roots. Perfect for smaller plants but limited in growth potential.
- Ebb and Flow (Flood and Drain): Plants are flooded with nutrient solution, then drained back into a reservoir. Great for larger plants or mixed gardens.
- Aeroponics: Nutrient mist is sprayed onto roots suspended in air, providing the highest oxygen levels. While efficient, it can be challenging for beginners.
Choosing the right system depends on what you want to grow, available space, and your budget. For a first-time setup, the Deep Water Culture (DWC) is a simple, low-cost choice and works well for greens like lettuce, spinach, and basil.
2. Essential Equipment for Hydroponics Beginners
To set up a basic hydroponic system, you’ll need the following materials:
- Container or Reservoir: This holds your nutrient solution. It can be a plastic tub, a bucket, or any watertight container.
- Net Pots or Plant Cups: These will hold your plants. Choose cups that allow roots to access water.
- Growing Medium: Since hydroponics skips soil, you’ll need a substitute like clay pellets, coco coir, or Rockwool to support the plant.
- Nutrient Solution: This is the “food” your plants need. Premixed solutions tailored for hydroponics are available for various plant types.
- pH Testing Kit: pH levels should be around 5.5-6.5 for most plants, so having a pH tester ensures the water remains optimal.
- Air Pump and Air Stone: These are essential for oxygenating the water, especially in Deep Water Culture setups.
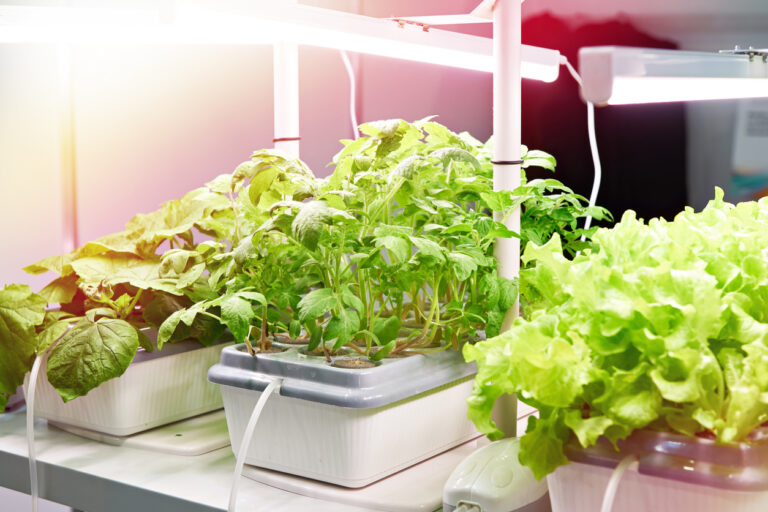
- Light Source: If you’re growing indoors or in a low-light area, a grow light mimics sunlight. LED grow lights are energy-efficient and ideal for small spaces.
3. Step-by-Step Guide: Hydroponics for Beginners Setup
Step 1: Prepare the Container
Choose a container large enough to support the number of plants you want. Dark-colored containers are ideal, as they limit algae growth by blocking light. Cut holes in the lid to hold the net pots (if using a bucket) or insert them into pre-drilled holes (if using a commercially bought setup).
Step 2: Add the Growing Medium
Fill your net pots or plant cups with your chosen growing medium. Clay pellets are beginner-friendly, offering excellent drainage and reusable qualities. Rockwool also works well but needs to be pre-soaked in pH-adjusted water before use.
Step 3: Add the Nutrient Solution
Fill your container with water, then add the hydroponic nutrient solution according to the package instructions. Mix well and check the pH level to ensure it’s in the ideal range. pH adjustment kits are inexpensive and essential for balancing your water solution.
Step 4: Set Up the Air Pump and Air Stone
Place the air stone at the bottom of the container and connect it to the air pump. The pump adds oxygen to the nutrient solution, which keeps the roots healthy. This step is vital in Deep Water Culture systems to avoid root rot and promote optimal growth.
Step 5: Position Your Plants
Place your net pots with seedlings or cuttings into the container, ensuring the roots are in contact with the nutrient solution. In setups like NFT, only the root tips should touch the solution as they grow, but for DWC, the entire root can be submerged.
Step 6: Adjust Lighting
If growing indoors, position a grow light 6-12 inches above the plants. LED lights with blue and red spectrums support leaf and flower growth and can be adjusted as your plants grow taller. Leave the light on for 14-16 hours a day to mimic natural sunlight for most plants.
4. Best Plants for Hydroponics Beginners
Certain plants are particularly well-suited for hydroponics, making them perfect for beginners:
- Lettuce and spinach: These are fast-growing and thrive in nutrient-rich water.
- Herbs like basil, mint, and parsley: They grow quickly and can be harvested frequently.
- Strawberries and cherry tomatoes: While slightly more challenging, these are rewarding plants that grow well in hydroponic systems with a bit of care.
Once comfortable, you can explore other plants, such as peppers, cucumbers, or even dwarf fruit trees, though these require more advanced setups.
5. Monitoring and Maintenance Tips
Maintaining a hydroponic system involves a few essential tasks:
- Regular pH Checks: Test the pH level every 2-3 days, adjusting as needed. Many plants thrive in a pH range of 5.5-6.5.
- Nutrient Solution Refills: Top off the solution as water evaporates. Every 1-2 weeks, replace the entire nutrient solution to prevent salt build-up and nutrient imbalance.
- Temperature Control: The ideal temperature for hydroponic water is between 65-75°F (18-24°C). Use a thermometer to keep an eye on it, and consider an aquarium heater in colder climates.
- Light Management: Ensure your grow lights are set to 14-16 hours daily, adjusting as plants grow. Overexposure can burn plants, while underexposure will slow growth.
- Preventing Algae: Algae growth can be a common issue. Using a dark container and keeping the system out of direct sunlight helps prevent it.
6. Troubleshooting Common Hydroponic Issues
- Yellowing Leaves: Often a sign of nutrient deficiency or incorrect pH levels. Check both and adjust as necessary.
- Root Rot: A common issue caused by poor oxygenation or high temperatures. Adding an air pump and keeping the water temperature below 75°F helps prevent it.
- Slow Growth: This can be due to insufficient light or inadequate nutrient levels. Ensure grow lights are close enough, and nutrient levels are consistent.
7. Benefits of Hydroponic Gardening
Hydroponics has numerous advantages over traditional soil gardening, making it ideal for urban gardeners and those with limited space. Key benefits include:
- Faster Growth Rates: Because nutrients are readily available, plants grow 30-50% faster than in soil.
- Efficient Water Usage: Hydroponics uses up to 90% less water than traditional gardening, as water is recirculated within the system.
- No Weeding or Soil-Borne Pests: Eliminating soil removes the hassle of weeds and many common pests, reducing the need for pesticides.
- Flexible Location: Hydroponics allows gardening indoors, making it possible to grow year-round regardless of climate.
For more in-depth scientific research and advanced techniques, visit Cornell Controlled Environment Agriculture.
8. Expanding Your System
Once you’ve mastered the basics, you may want to scale up or try different hydroponic methods. Larger systems like Ebb and Flow or NFT are excellent for growing a variety of plants, while Aeroponics offers maximum oxygen exposure for roots, though it requires more precise control.
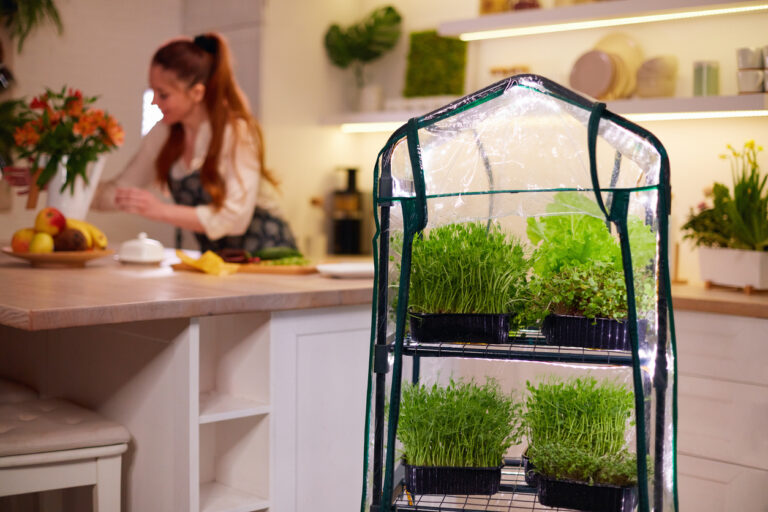
You could also experiment with vertical hydroponic gardens, which save space and add a unique visual appeal to indoor spaces. Many beginner-friendly kits are available, allowing you to expand without reinventing your setup entirely.
9. Building a Sustainable Hydroponic Practice
Starting small with hydroponics lets you ease into the practice while keeping it sustainable and affordable. Here are a few eco-friendly tips to enhance your hydroponic garden:
- Reuse Growing Mediums like clay pellets by sterilizing them between plant cycles.
- Compost Plant Waste: Once plants have completed their cycle, compost the remnants instead of discarding them.
- Recycle Water: After changing the nutrient solution, reuse the old solution in traditional soil gardens to minimize waste.
Conclusion
Setting up hydroponics for beginners doesn’t have to be complex. By following these steps, you’ll be growing plants in no time. Whether you’re looking to grow herbs on a windowsill or start a year-round garden indoors, hydroponics makes gardening accessible and sustainable. Embrace this journey, and soon you’ll be harvesting fresh produce from your very own hydroponic setup.